Update: I’ve made a few adjustments to the process in my Resetting My Chromebook Back to Stock post. Mainly script cleanup and a way to do this without being in developer mode. This post still has the basics and a lot of good info not covered in the new post.
If you read any of my post on Android apps on on Thinkpad Chromebook then you know that my primary machine is a Thinkpad 13 Chromebook. This was an artificially imposed restriction on my end, to make me do more with less. While the experience has be very pleasant there have been a few places where a ‘little’ more power or options would be welcomed - that’s where Termux comes into play.
For those who don’t know what Termux is, it’s a terminal emulator and Linux environment for Android with a package manager. Since Chromebooks now run an Android system in the background it also runs on a Chromebook. After a lot of Googling followed by a lot of trial and error this is what I have come up with. The following should work on non-developer mode enabled Chromebooks - it works for me but you might have a different experience.
To Start
First off install Termux from the Playstore - I had tried installing it before the Playstore was enabled on the Thinkpad and it did not load, so keep that in mind. Then copy the below script into a ‘hugo-install.sh’ file - you can name it what you like, but I refer to it by this name for the rest of the article.
Here’s the shell script to install hugo:
# Install hugo
apt update;\
apt install -y git golang make;\
export GOPATH=$HOME/go;\
export PATH=$PATH:$GOPATH/bin;\
go get -d github.com/spf13/hugo;\
cd $GOPATH/src/github.com/spf13/hugo;\
make install;\
# If the Docs are needed here is the command to run them
# hugo server -s docs;
Then open with Termux, select ‘open folder’, then type the following:
sh hugo-install.sh
Note: the hugo-install.sh is whatever you call the shell script
Get you IP
This is a step that the Android installations of hugo don’t need to do, but the Chromebook installs need to. Basically Termux runs in a container, so ‘localhost’ is not accessible to the Chromebook. To alleviate this we can do a the following to get the IP address of Termux:
ifconfig arc0 | awk '/inet /{print $2}'
# outputs addr:100.115.92.2 in my case
Note: the IP as you will need if the following script - simply replace mine with your value
After that you can use the following ‘hugo-run.sh’ script to run hugo. I’ve got mine navigating to the directory that I need to run the Camping Coder hugo site, but if you’ve made it this far you probably have already figured that out. Notice that I’m binding to “0.0.0.0” to expose the Hugo instance outside the Termux container.
# Run hugo without updating / reinstalling
export GOPATH=$HOME/go;\
export PATH=$PATH:$GOPATH/bin;\
cd $GOPATH/src/github.com/spf13/hugo;\
make install;\

# Now to where I want to go
alias pathIwant="cd $HOME/storage/downloads/campingcoder"
pathIwant

hugo server --bind="0.0.0.0" --baseURL="http://100.115.92.2"
Edit: I’ve updated the script to make it a little easier.
Then open with Termux, select “open folder” followed by typing the following:
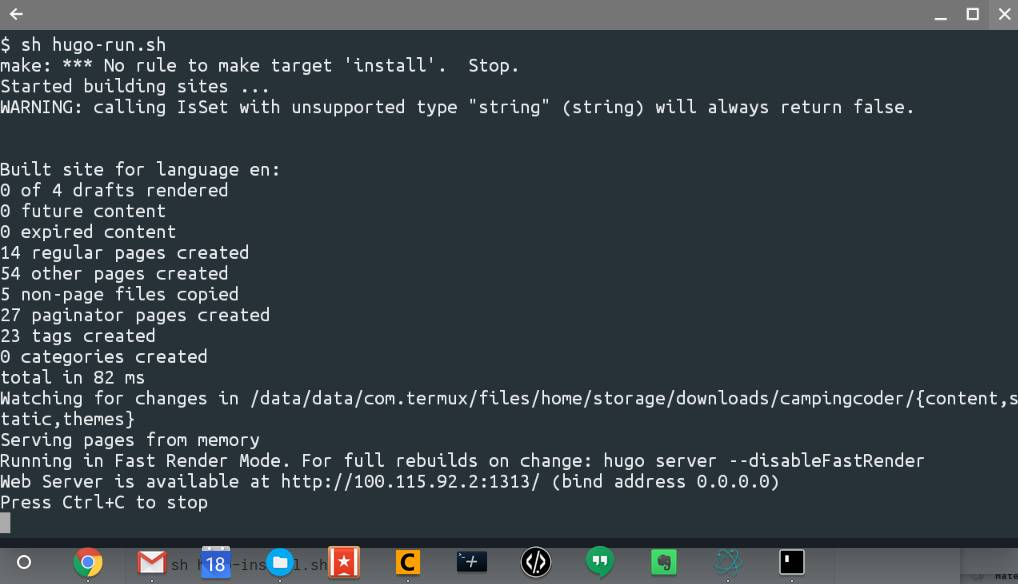
sh hugo-run.sh
Note: the hugo-run.sh is whatever you call the shell script
Overall
This works for me as it lets me quickly test out changes on the Thinkpad Chromebook without needing to deploy to Bitbucket Pipelines, which was my prior workflow. I still use Pipelines for deployments, but that’s another topic altogether. There are a few issues, such as needing to do the ‘make install’ which is in the ‘hugo-run.sh’ every time before calling the ‘hugo’ command, and it seems that I need to cycle the hugo server as it’s not picking up the changes to the files. Additionally there is an odd error with ‘make’, but it’s not stopping me from anything. Issues aside this is a great solution for myself as I don’t need to have a VM, background Linux install, raspberry pi dongle, etc to test out changes that I might do in Hugo.
Reference Information
The following post are what helped me get thru this little project:
- Using a Chromebook for Web Development
- My $169 development Chromebook
- Hugo-on-android (initial code comes from here)
- Termux homepage
Links to the other posts in the Chromebook series
- Android Apps arrive on ThinkPad Chromebook 13
- Running Hugo on Chromebook
- Thinkpad Chromebook a year later
- Resetting My Chromebook Back to Stock
- Hugo + gulp = Chromebook awesomeness
- Running Tmux for Termux on a Chromebook
- Hugo + SHH - gulp = a new workflow
- Hugo and droppy, Chromebook friends
- 3D Printing from a Chromebook
- Monoprice Mini Delta
- 3D Printing with Astroprint
- Scaling woes with 3D Printing
- Maxing out the Mini Delta 3D printer
Always follow the manufacturers instructions, this write up is simply the way that I do it, and it may or may not be the right way. Use your common sense when applying products to or altering your stuff and always wear the appropriate safety gear.